What are SwiftUI Transitions and How Do You Use Them?
Mark Moeykens
Dec 27, 2019
The word “transition” means "the process of change from one state to another."
Transitions are pre-made instructions you can apply to views that explain two things:
- How to be inserted into the screen.
- How to be removed from the screen.
Just a transition on a view will have no effect.
For example, this will have no effect on the image:
Image("driving")
.transition(AnyTransition.slide)
It’s up to you to ALSO supply an animation.
Example:
Image("driving")
.transition(AnyTransition.slide)
.animation(.default)
It is important to note that a view with a transition and animation will still have no effect.
No, you have to ADD the view that has the transition to the screen (and optionally remove it from the screen) to see the effect.
Example:
if change {
Image("driving")
.transition(AnyTransition.slide)
.animation(.default)
}
So, every view with a transition needs 3 things:

(click for larger view)
- The view needs to be added or removed in some way. This is usually done with an if statement.
- The view being added or removed needs the transition modifier applied to it.
- There needs to be an animation modifier the transition can use. This animation can be applied either:
* Directly to the view
* To the view’s parent
* To the variable that’s controlling the condition of when the view is inserted or removed (called an “explicit animation”)
Example

What SwiftUI Transitions Are Available to Me?
There are 5 transitions available in SwiftUI:
- Slide - slide in the view from the leading side and remove it towards the trailing side.
- Move - slide in from the direction specified and remove it from the same direction.
- Opacity - fade in the view when inserted and fade out the view when removed.
- Scale - insert the view FROM the scale specified and reverse the effect when removed.
- Offset - like the move transition by you can set your own x and y coordinate.
Working with Animations
An animation is necessary to see the transition effect specified. You have three choices for applying an animation:
- Apply an animation directly to the view (like in the example above)
- Apply an animation to the parent view
- Use an explicit animation (withAnimation) around the variable change that controls when the view is inserted/removed.
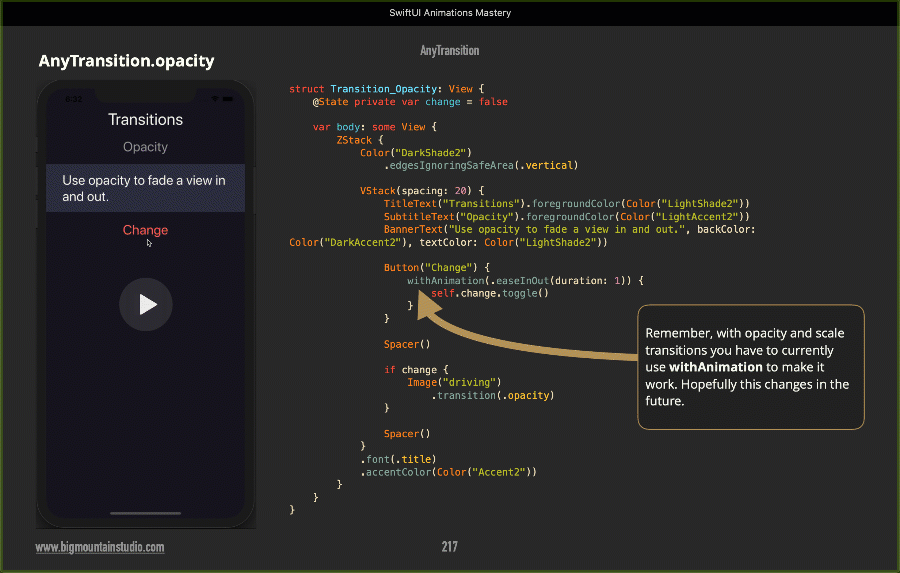
Quick Warning
As of this writing, the opacity and scale only work with explicit animations (withAnimation). This may change in future releases but at this time, this is what I have observed.
Example
Combining Animations
You can combine these transition effects to work together using the combine function.
Example:
Example:
if change {
Image("window")
.transition(AnyTransition.slide.combined(with: .opacity))
}
Here is what it looks like in use:

Create Different Insertion & Removal Effects
So far, you have seen how transitions insert and remove using the same effect. But you can use another modifier that lets you specify a different removal effect than the insertion effect.
For example, you can insert the view with a slide effect and then remove it with a move effect.
You accomplish this by using the asymmetric function. The word “symmetric” means “exactly the same”. And as you can guess, "asymmetric" means "not the same". Not the same insertion and removal effect to be precise in this case.
Here is an example of how this works:
.transition(AnyTransition.asymmetric(insertion: .slide, removal: .move(edge: .bottom)))
You may also want to use different animations for insertion and removal. To achieve this, use explicit animations (withAnimation) when you change the variable that controls the insertion and removal.
Here is an example:

The insertion is using a slide transition with the spring animation to give it a little bounce. And the removal is using the move transition to the bottom with the easeIn animation so it speeds up towards the end of the transition.
