The Trail: Follow Big Mountain Studio's Journey
How To Update Your Big Mountain Studio Books
As your books are updated, you will want to download newer versions of that book.
Follow this video to learn how to log in, where to look, and how to know which version of the book you want to download.
SwiftUI Environment: How to share data between views in 2024

SwiftUI’s @Environment is a powerful tool that allows you to share data (with an observable object) between multiple views.
It is particularly useful when you have a complex view hierarchy and need to share the same observable object between views that are not directly connected.
Concepts
You could pass your observable object through view initializers, from parent to child to child to child, etc. This can be a lot of work.
Using environment objects allows you attach an object (instance of an observable object) to a parent view.
Any descendants (child views, sub views) of that parent view now have access to that object.

(This is a page from the book “SwiftUI Essentials: Architecting Scalable & Maintainable Apps”)
1. Create Your Observable Object
To use Environment, you first need to create an Observable class that has the @Observable attribute.
This class will hold the data that you want to share between your views.
@Observable
class DeveloperOO {
    var name: String = "Awesome developer"
}
2. Add Object to the Environment
Next, you need to create an instance of this class and pass it to your top-level view using the .environment(_:) modifier.
var body: some View {
    ContentView()
        .environment(DeveloperOO())
}
In this example, all subviews within ContentView can access the DeveloperOO observable object.
Container View Example
Another common example is to add an observable object to a container view, such as a NavigationStack or TabView so any descendant views can access it.

(This is a page from the book “SwiftUI Essentials: Architecting Scalable & Maintainable Apps”)
3. Access the Object in the Environment
Now, any view in your hierarchy can access this object by declaring an @Environment property.
struct DetailView: View {
    @Environment(DeveloperOO.self) var devInfo

    var body: some View {
        Text("Hello, \(nameInfo.name)!")
    }
}
That’s it!
Note: The type (
DeveloperOO.self) is what makes this all work.As long as the type is the same, your view will find the matching object in the environment.
Child View Example
In a previous example, an observable object was added to the TabView’s environment.
This is how one of the tab views can access that observable object:

(This is a page from the book “SwiftUI Essentials: Architecting Scalable & Maintainable Apps”)
You can now access and modify the shared data from any view in your hierarchy.
Warning: EnvironmentObject and NavigationStack
Imagine this view hierarchy:
View 1 has a NavigationStack with a NavigationLink to View 2
View 2 has a NavigationLink to View 3
View 3

View 1 and View 3 both use the same observable object.
Here is View 1:
struct View1: View {
    @State var oo = DeveloperOO()

    var body: some View {
        NavigationStack {
            NavigationLink("Navigate to View 2") {
                View2()
            }
            .navigationTitle("Parent View")
        }
    }
}
Question: Where do you set the .environment modifier?
You might think you add it to View2 so it can be passed on to View3:
NavigationLink("Navigate to View 2") {
    View2()
        .environment(oo)
}
❌ This is incorrect!
The observable object would just be in View2's environment which does not include View3. So View3 will not be able to access it.
Put Environment Object on the NavigationStack
✅ The correct solution would be to put the environment object on the navigation stack.
struct View1: View {
    @State var oo = DeveloperOO()

    var body: some View {
        NavigationStack {
            NavigationLink("Navigate to View 2") {
                View2()
                    .environment(oo) // ❌
            }
            .navigationTitle("Parent View")
        }
        .environment(oo) // ✅
        .font(.largeTitle)
    }
}
All views you navigate to within a navigation stack are considered within the navigation stack's view hierarchy.

Now, every view within the navigation stack can potentially access the observable object through the environment if needed.
Previews
To preview a view that uses the @Environment, you will have to add the .environment(_:) modifier to the previewed view like this:
#Preview("Child View") {
    TabViewOne()
        .environment(DeveloperInfo())
}
Use the
environmentmodifier to add the observable to the view or else you will get a preview error.The parent view doesn't need this because it is the view that sets the environment object.
Conclusion
The @Environment property wrapper is a powerful tool for sharing data between different views in your SwiftUI application.
By passing an object down the view hierarchy using the environment(_:) modifier, you can access it from any view without having to pass it explicitly as a parameter.
You use @Environment when:
You want to create a global place for views to access data
You want to create two-way bindings between the data and the UI
You want multiple views to simultaneously get updated when one observable object is updated
Learn More
You can also learn more from my book SwiftUI Essentials: Architecting Scalable & Maintainable Apps:
Learn architecture and data in SwiftUI with "SwiftUI Essentials”.

Your Learning Path Quick Links
Create UI with SwiftUI Views Mastery (beginner)
Architect your app using SwiftUI Essentials (beginner)
Improve your app's UX with SwiftUI Animations Mastery (junior)
Save & sync your app's data with Core Data Mastery -or- SwiftData Mastery (junior)
React to and manipulate data using Combine Mastery in SwiftUI (advanced)
How to Align Text and Views in SwiftUI
Alignment or Layer Problem?
Recently in my local Apple development Slack group, someone asked:
In an
HStackwith two elements, how can I center-align one element and right-align the other?
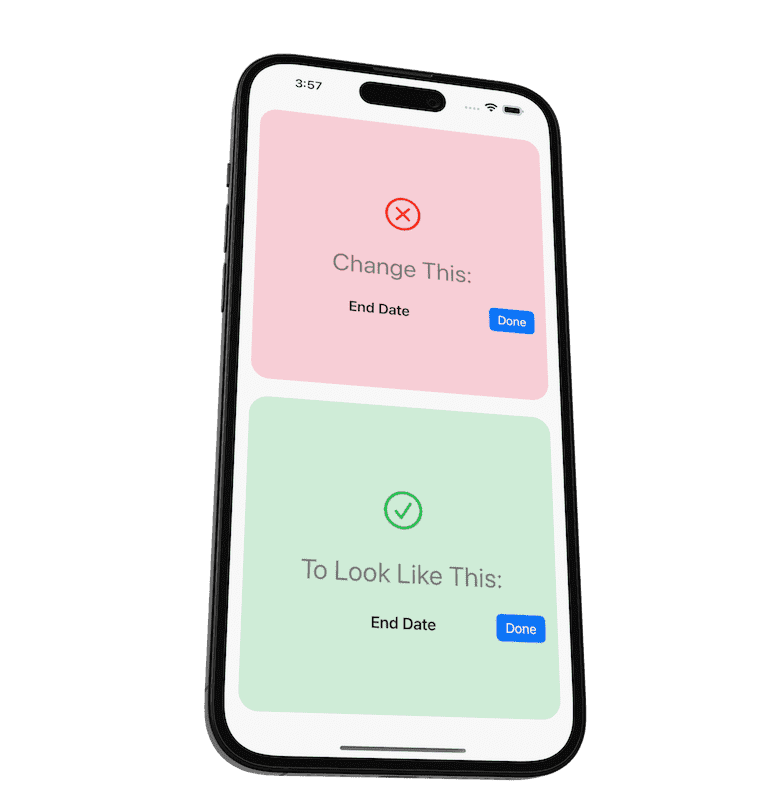
"End Date" should be center-aligned
The Done button should stay on the trailing side.

Currently the "End Date" is not centered within the screen's width.
Here is the code he started with:
HStack {
    Spacer()
    Text("End Date")
        .font(.title3.weight(.semibold))
    Spacer()
    Button("Done") { }
        .buttonStyle(.borderedProminent)
}
.padding()
Immediately, you might think this is an alignment problem.
But actually, the solution is with layers (and then alignment).
Layers
I find it easier to align individual views within their own spaces. I rarely use the Spacer() view.
So I would put the text and button on their own layer and align them separately.
When working with layers in SwiftUI, you should think in 3 ways:
ZStack
Overlay
Background
The above layout can be solved using ANY of the 3 ways above.
Let's take a look:
ZStack
ZStack(alignment: .trailing) {
    Text("End Date")
        .font(.title3.weight(.semibold))
        .frame(maxWidth: .infinity)
    Button("Done") { }
        .buttonStyle(.borderedProminent)
}
We have the text stretch to the full width of the screen and within the frame, the text will be centered.
Since the alignment is set on the ZStack, any view not filling the total width will be trailing-aligned, such as the button.
Overlay
Text("End Date")
    .font(.title3.weight(.semibold))
    .frame(maxWidth: .infinity)
    .overlay(alignment: .trailing) {
        Button("Done") { }
            .buttonStyle(.borderedProminent)
    }
Again, the text is stretched full width.
The overlay modifier sets the alignment to trailing so anything within it will be aligned.
Background
Text("End Date")
    .font(.title3.weight(.semibold))
    .frame(maxWidth: .infinity)
    .background(alignment: .trailing) {
        Button("Done") { }
            .buttonStyle(.borderedProminent)

    }
Similar to overlay, but uses the background modifier instead.
The button will still work if it's not covered up.
Here is the result:

Which solution is better?
As you can see, all three solutions solve the problem.
But there is one thing to note:
Views within the overlay and background can extend beyond the parent view.
When you add .border(.red) to each of the solutions, you can see this:
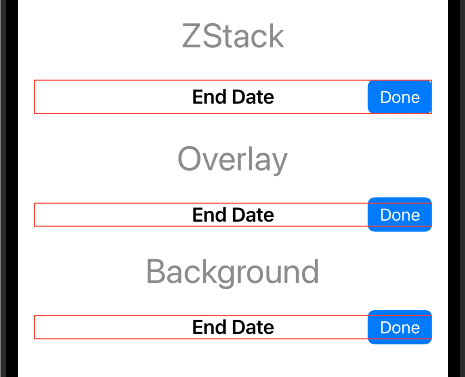
Notice the buttons go beyond the border for the overlay and background solutions.
This could potentially interfere with your layout. So it is something to keep in mind when using them.
A good rule to follow is:
Your parent view should take up more space than your background and overlay views.
This will help prevent potential layout problems.
Free Book
Unlock your SwiftUI potential and take your app-building skills to the next level with the free guide, “SwiftUI Views Quick Start”.
Your Learning Path Quick Links
Create UI with SwiftUI Views Mastery (beginner)
Architect your app using Working with Data in SwiftUI (beginner)
Improve your app's UX with SwiftUI Animations Mastery (junior)
Save & sync your app's data with Core Data Mastery -or- SwiftData Mastery (junior)
React to and manipulate data using Combine Mastery in SwiftUI (advanced)
SwiftUI: How do I Change the Background Color in 2024?
In this blog post, we’re going to learn 3 ways to add background colors to a SwiftUI screen.
Thinking in Layers in SwiftUI
There are many ways to create layers in SwiftUI:
Background modifier
Overlay modifier
ZStack view
Each of these items can be used to create background colors.
Let’s look at examples of each.
Background Modifier
Here’s an example of how to add a background color to a SwiftUI view using the background modifier:
struct Background_Color: View {
    var body: some View {
        VStack {
            Text("Using Background Color")
        }
        .frame(maxWidth: .infinity, maxHeight: .infinity)
        .background {
            Color.teal.opacity(0.3)
                .ignoresSafeArea()
        }
    }
}
Things to note:
If you are using the background modifier then your root view should take up the whole screen (that’s why you see max width and height on the VStack).
The ignoresSafeArea() modifier is used on the color so it extends into the safe areas.
What is the Safe Area?
The safe area is where your UI can be presented without device elements covering them up, such as a notch, island, or the home indicator at the bottom of the screen.

Safe Area — Page from SwiftUI Views Mastery book by Big Mountain Studio
Overlay Modifier
Here’s an example of how to add a background color to a SwiftUI view using the overlay modifier:
struct Overlay_BackgroundColor: View {
    var body: some View {
        Color.teal.opacity(0.3)
            .ignoresSafeArea()
            .overlay {
                VStack {
                    Text("Using Overlay")
                }
            }
    }
}
Things to note:
Color views are “push-out” views, meaning they will use up as much space as they can. So you don’t have to add maxHeight and maxWidth to make them stretch out.
Your main screen content will go directly into the overlay modifier.
ZStack View
Here’s an example of how to add a background color to a SwiftUI view using the ZStack view:
struct ZStack_BackgroundColor: View {
    var body: some View {
        ZStack {
            Color.teal.opacity(0.3)
                .ignoresSafeArea()

            Text("Using ZStack")
        }
    }
}
Things to note:
The ZStack layers the containing views within it. The first view (the color in this case) is the furthest back.
This is my preferred method of adding a background color to a view in SwiftUI. It’s very clean, with less indenting.
Background for List View
Here's an example of how to add a background color to a SwiftUI List:
struct Background_List: View {
    private var stringArray = ["Lemuel", "Mark", "Chris", "Chase", "Adam", "Rodrigo"]

    var body: some View {
        List(stringArray, id: \.self) { string in
            Text(string)
        }
        .background(Color.teal.opacity(0.3))
        .scrollContentBackground(.hidden)
        .font(.title)
    }
}
If you want the background to show behind the rows too, then you can use the listRowBackground modifier:
struct Background_List: View {
    private var stringArray = ["Lemuel", "Mark", "Chris", "Chase", "Adam", "Rodrigo"]

    var body: some View {
        List(stringArray, id: \.self) { string in
            Text(string)
                .listRowBackground(Color.clear)
                .listRowSeparator(.hidden)
        }
        .background(BackgroundView())
        .scrollContentBackground(.hidden)
        .font(.title)
    }
}
Things to note:
Since the List pushes out to take up the whole screen, you don't need to use a
ZStackhere.What makes this work is the
scrollContentBackgroundmodifier on the List. This will also work for anyScrollViewtoo.
Using a Named Color
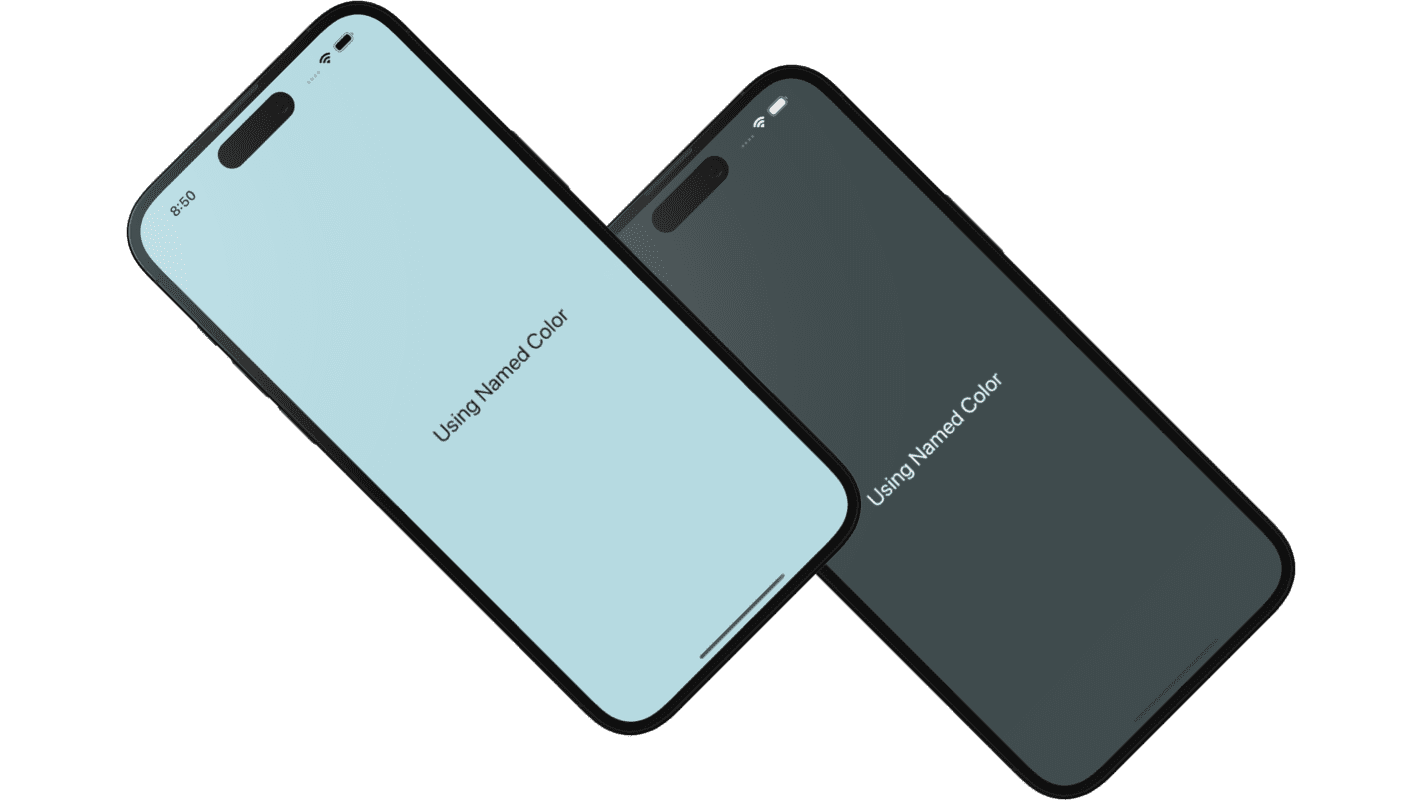
You can create a color set in your Xcode Asset Library (Assets.xcassets file):

Then you reference the name of this color ("BackgroundColor") in code:
struct Background_NamedColor: View {
    var body: some View {
        ZStack {
            Color("BackgroundColor")
                .ignoresSafeArea()

            VStack {
                Text("Using Named Color")
            }
            .font(.title)
        }
    }
}
Managing Your Backgrounds
It may be simpler to have your background defined in just one view that you can use everywhere.
Here's an example of how you can do that:
struct Background_ExtractedView: View {
    var body: some View {
        ZStack {
            BackgroundView()

            VStack {
                Text("Using Extracted View")
            }
            .font(.title)
        }
    }
}

struct BackgroundView: View {
    var body: some View {
        Color.teal
            .opacity(0.3)
            .ignoresSafeArea()
    }
}
If you change your mind later, you can replace the content of the BackgroundView with a different background, such as a blurred image:
struct BackgroundView: View {
    var body: some View {
        Image("mountain")
            .resizable()
            .scaledToFill()
            .ignoresSafeArea()
            .opacity(0.5)
            .overlay(.thinMaterial)
    }
}
Or a gradient:
struct BackgroundView: View {
    var body: some View {
        LinearGradient(colors: [Color.teal, Color.indigo],
                       startPoint: .topLeading,
                       endPoint: .bottomTrailing)
            .opacity(0.5)
            .ignoresSafeArea()
    }
}
Things to note:
The
BackgroundViewcan be in a separate file where your other common, reusable views are.Once used throughout your app, you can just make changes in one place to affect all backgrounds.
I usually add some opacity to the background so light and dark modes show better.
Free Book
Unlock your SwiftUI potential and take your app-building skills to the next level with the free guide, “SwiftUI Views Quick Start”.

Your Learning Path Quick Links
Create UI with SwiftUI Views Mastery (beginner)
Architect your app using Working with Data in SwiftUI (beginner)
Improve your app's UX with SwiftUI Animations Mastery (junior)
Save & sync your app's data with Core Data Mastery -or- SwiftData Mastery (junior)
React to and manipulate data using Combine Mastery in SwiftUI (advanced)
New Book to Help Coders use AI - And Some Challenges
The first step to creating a new product of any kind is to see if users are interested in it.
You want to answer the question: Is the product needed and wanted?
In attempting to do this, I don't think I did a good job at this on a new book idea I've been working on.
The book is called "AI for Coders". You've probably heard of it by now.
Initial Tweet
It started with a tweet on Twitter.
I included the link to the book idea and some sample pages describing what the book was about.
And I got one response that was...kind of negative.
Now, clearly, this user got the wrong impression of what the book was about because they were talking about something completely different.
I handled it through direct messaging and the user got a clearer understanding that the book was not about how to CREATE AI but how to USE it.
The same thing happened with the same post on LinkedIn with a different person.
I got a strange comment and followed up with the person and hopefully, it's clearing up but I'm not so sure yet.
So What Happened?
First of all, I don't think these people meant any harm in their responses.
They are actually two existing customers of mine. They were just expressing their concerns so please don't reply to their comments or retaliate.
When evaluating this, I think there are a few issues I have identified that I can handle:
1. Book Title
Maybe "AI for Coders" isn't the best title as it could lead people to think it's about how to CREATE AI or large language models or machine learning, etc.
It's about how to USE AI and I really wanted to share how it's been helping me and my team at work.
(Recently, I also showed my friends who are Amazon sellers how to use AI to save them tons of time in their workflow. They were blown away by the results and are now using AI to great success.)
These are the wins I want all developers to have.
So I need to find a better book title that communicates this.
2. Different Market
Another challenge is my market/audience is mainly SwiftUI developers.
So when they see me creating a book about how to use AI, this creates some confusion.
AI can be used while developing or to promote your apps, debug problems, organize your time, learn concepts faster, etc but this coming from an educator who writes SwiftUI books?
3. Authority
The question comes up, "Who are you to write this book?"
This was a common theme of the two people that responded, even though it was more about "Who are you to write this book who has no experience with CREATING AI?"
Although that's not what I'm teaching, it did make me think about the topic of "authority".
"Authority" is simply demonstrating you know something about what you're teaching. I've learned from a lot of entrepreneurial courses that this is a vital step to creating and selling products.
I haven't really done this yet with using AI.
So I think the answer might be to start creating videos and posts about how to use AI as a developer.
This might be enough to bridge the two markets while at the same time demonstrating knowledge.
Other Responses
Now, remember, those are just two people's responses.
On the other hand, I have received overwhelmingly positive responses from people who are looking forward to the book after seeing what the book is actually about!
I have a Google Form to collect feedback on the book draft and it's all been positive so far. (The Google Form link is in the draft book.)
So What IS the Book About?
I want to introduce developers to AI and teach them how to effectively leverage it to help them out.
I broke the book down into different aspects of a developer's life. (See "Book Contents".)
Prompt engineering (how to ask AI to effectively get what you want) is at the heart of the book.
With prompt engineering, I want to show the extent of what you can accomplish and the results will surely blow your mind when you first learn them. 🤯
Summary
Let me know what you think and if you're excited about learning how you can use AI to speed development, market your app and learn more easily.
You can also show your interest by going here and signing up.
Almost Lost Big Mountain Studio, Core Data Mastery Book Update, Upcoming Birthday Sale
Hey everyone, I just wanted to provide an update on what has been happening lately here at Big Mountain Studio.
I have been inactive for a while because I am going through a divorce. And what to do with Big Mountain Studio was undecided up until recently.
There were many possibilities for Big Mountain Studio's future:
Sell the company
Sell my half of the company
Sell my wife's half of the company
She buys me out
I buy her out
Close the company
The good news is she accepted my offer to buy her out of her half.
This means I'm back to owning 100% of Big Mountain Studio and can now continue working on it once again! I had forgotten how much joy it brings me to help others and create educational materials.
Core Data Mastery in SwiftUI
I have resumed working on Core Data Mastery in SwiftUI. Things are a little slow right now because I have to get back into the Core Data mindset again.
I literally went back and re-read over 300 pages of the book that were already written.
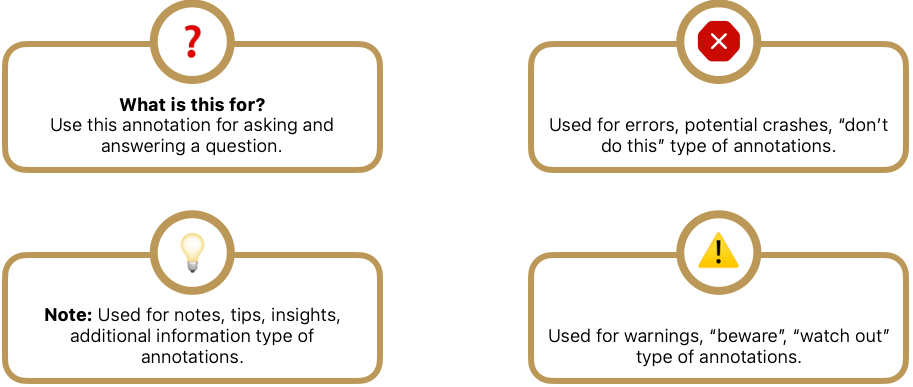
Some of the book conventions were updated as a result, such as these annotations:
Sign Up to Get Notified
Someone on Twitter asked me how to sign up to get notified. And it struck me, "I never set up a way for people to get notified!"
So I created a product image and then a landing page so people could sign up to get notified now:
When will it be released?
I'm aiming for before April!
And yes, it could be sooner than that. But April is the latest.
Upcoming Birthday Sale
The annual birthday sale is coming up soon!
My birthday is on Feb 10th and the discount is equal to the age I will be turning and this year that is 52!
So that means 52% off of:
Working with Data in SwiftUI
SwiftUI Views Mastery
SwiftUI Animations Mastery
Combine Mastery in SwiftUI
This used to be a one-day sale but after 3 years of experience with this now I think I'm going to make it a 3-day sale because, with just one day, I get a ton of people messaging me the following days with how they were busy the day of the sale and missed it.
OK, well that's it for me. I wish everyone the best while I get back to working on Core Data Mastery with SwiftUI!
Your SwiftUI friend,
Mark Moeykens
Core Data Mastery in SwiftUI Progress
Hello everyone,
I wanted to post an update on the Core Data Mastery in SwiftUI book.
I would say I'm probably... half done. The book is currently at 250 pages and I have a few beta readers giving me feedback as I try to regularly release new chapters.
The chapter I'm currently working on has been...challenging.
What is the next chapter?
Concurrency
Yes, concurrency is the next chapter. And this chapter has undergone probably 8 different revisions so far.
I have restructured it many times to get the progression right.
Now, I could have done this whole chapter in 2 pages, really. "Here's some code. Just do this."
I've read a few books on this topic in Core Data and many, many posts and documentation in this area and watched probably every WWDC video related to this....a few times.
But I get this nagging feeling in my brain. That unsatisfied feeling that 2 pages don't really explain HOW these two functions and their variations in Core Data work.
Deep Dive
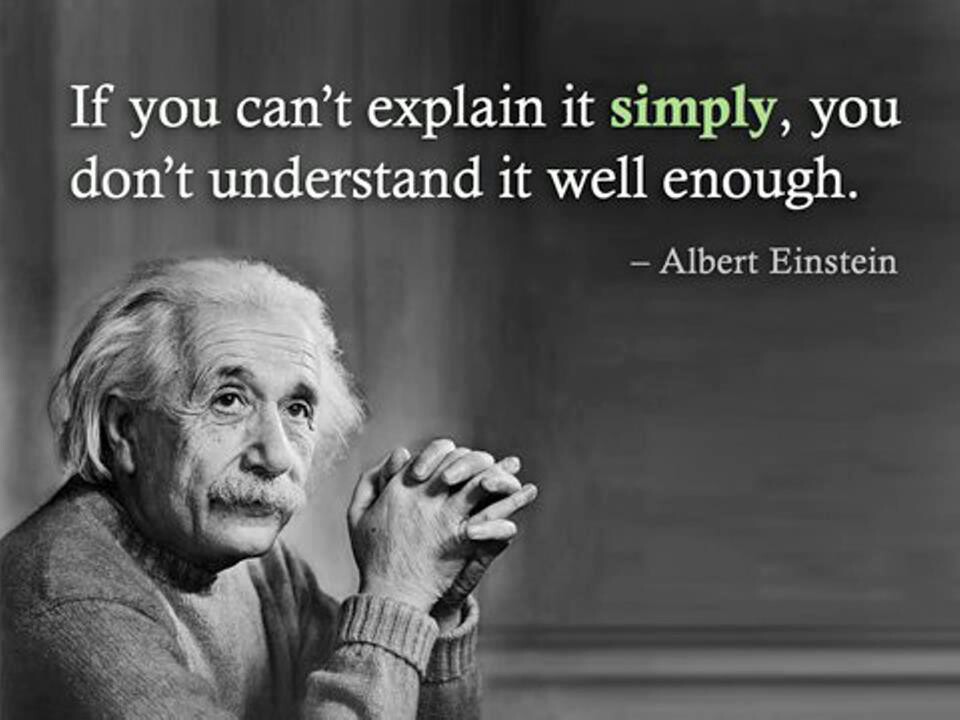
Albert Einstein said, "If you can't explain it simply, you don't understand it well enough."
Well, I say, "If you can't SHOW it simply, you don't understand it well enough."
And as I tried to show every aspect of concurrency, I found I couldn't show some parts of it simply. And I have access to some Apple employees and reached out to them, and they couldn't explain/show it simply. And my friends and community could not either.
I had to find a way to resolve this confusion that was preventing me from being able to show something simply. It was very frustrating! I wanted to go back to just using those 2 pages and call it good. But I would simply be doing to you what was done to me.
Last week I had a breakthrough though!
I finally figured out the missing piece and realized I was looking at it wrong. And as I started drawing diagram after diagram, other misconceptions also appeared revealing I didn't understand everything well enough.
Well, I'm happy to say I can finally SHOW concurrency in Core Data...simply.
Concurrency Mastery
Concurrency Mastery is another book that I started last year and so I added a lot of my notes there. Don't worry, I'm not switching gears to write that book now. But I do have more of a solid foundation on everything, now that it can be shown visually.
It was difficult to know where to draw the line between how much concurrency I should be teaching and how much of it in Core Data.
I think I have a good balance now.
And I think you're going to like where I'm going. I'm 28 pages into this chapter right now and have a little bit more to go.
Concurrency in Core Data
So, here are just a few things you will be learning once this chapter is finished:
What is a queue?
What are the two types of queues and which one does Core Data use and why?
What is a thread and how do they relate to queues?
How do you use Xcode to see not only the threads but the type of queue it's using?
What are the two rules of Core Data and threads?
What is the right and wrong way to use threads in Core Data?
How can Xcode help you find out if you have a thread problem?
How do I use Xcode to verify if the problem is fixed or not?
How can I use the perform function to fix these problems and follow the 2 rules of Core Data and threads?
What are sync, async, and parallelism?
And what do they look like?
How do they relate to Core Data?
What causes your UI to freeze and become unresponsive when using Core Data?
How can you use the Task object to help follow the 2 rules of Core Data and threads?
And there's more to do as I'll also be getting into async and await and background operations. But don't be scared. You're going to be seeing a LOT of pictures repeatedly so that you'll get it.
Hopefully, I'll get more time to work on it this week and coming weekend!
Your SwiftUI friend,
Mark Moeykens
PS - Don't forget that you can get the free Core Data Quick Start in SwiftUI book now. This will teach you just enough to get started with Core Data in SwiftUI.
I'm not sure if I'll keep this Quick Start version around after I release the Mastery book.
Theo
Oh wow, that's interesting! Thanks for the heads up, I'll make an example for the book!
Spring Sale Coming in May - Plus More Book Updates
🌷 Spring Sale
There will be a sale coming on the first of May! Mark your calendars:
Keep an eye out for an email notifying you when it starts.
Missing Notifications?
If you've not opted into email notifications then you may have missed out on past sales or notifications when your books have been updated.
To opt-in:
Log in
Click on your profile (upper right) > Settings
Notifications > Edit
Book Updates
Combine Mastery in SwiftUI
Updated the Fail publisher to show more in detail how the error enum works with the UI.
Adjusted the table of contents indentation to work better with ePUBS in Apple Books.
SwiftUI Views Mastery
I now include all the topics within a chapter in the table of contents. There were some chapters that were getting big, like List and Text views and so that led to a lot of page-flipping to find what you were looking for. Now you can more quickly find exactly what you are looking for!
ActionSheet - Example on iPad and attaching directly to the view you want the arrow pointing to.
Menu - Example of using Section within menus.
FullScreenCover - Example of using it to overlap NavigationView and TabView.
AllowsHitTesting - Example of when you would want to turn off hit testing on a view.
Working with Data in SwiftUI
-
Brand new chapter on working with JSON! Many of you work with JSON all the time when it comes to using online services. This reference will assist you in encoding and decoding and how to work around the common challenges of working with JSON.
The basics of JSON, what is it, and how does it work?
What data types are used?
Why is it called "encoding"?
What is UTF-8 and why does it matter?
When mismatched properties are ok and when they are not.
How to decode dates.
How do you decode into enums?
How to decode into enums and bind to a Picker view?
What if the JSON doesn't match your property names?
How do you work with nested objects?
All examples use observable objects to keep them more "real world".
Summary
So there you go! Lots of updates for you to enjoy.
Download updates to your books today.
🌷Remember, there will be a sale starting on May 1st.
Your SwiftUI friend,
Mark Moeykens
Big Mountain Studio
Spring 2022 Book Updates
In this post, you will learn about Spring 2022 book updates.
These are free updates to customers who own the most recent books so go ahead and download the updated books!
SwiftUI Views Mastery (iOS 15)
Disabled modifier - There is a dedicated page for this in the Buttons chapter and a dedicated section for this in the OTHER MODIFIERS chapter towards the end of the book.
Header Prominence - In iOS 15 there was a new modifier that slipped by me called headerProminence that can be used to style your Section headers. Examples can be found in the Form and List sections of the book.
Link options - I included more examples of how to use the Link view to call, email, and message. There are also examples of how to apply the iOS 15 button styles to the Link view.
Custom NavigationView - It looks like these pages were misplaced in the NavigationLink section. I corrected this and moved them into NavigationView.
SeachCompletion - The example in the book actually didn't work the way it was laid out. The searchable modifier will treat views within as a single row. Single rows that have more than one searchCompletion modifier will default to using the LAST searchCompletion modifier. This has been fixed.
Labels in TabViews - Since the release of Label views in iOS 15 I've been seeing more and more developers use them to set a TabView's tab's image and text. I really like this use of the Label view so I included an example of this.
Download the latest free update if you own this book or buy it if you want to upgrade from the Quickstart book.
Working with Data in SwiftUI
Property Wrappers - New chapter explaining what they are, how they work, and how to create and use them. It comes right before the @State chapter.
-
Input & Event Modifiers - New chapter covering how to react to data changes in different ways within SwiftUI. Includes:
onChange (including how to access the previous value that got changed)
onReceive (with examples connected to an observable object)
onSubmit (also shows how to use the submitLabel modifier as they work really well together)
You can download this free update now or buy this essential book if you don't already own it.
Membership All Moved to Code with Chris 👍
All Adventurer members should now be moved over!
This is specifically for the paid membership called Adventurer.
So there were two levels of membership:
Explorer - Free
Adventurer - Paid
The paid membership, Adventurer, is what was moved to Code with Chris.
If you were an adventurer with an active subscription and are having any trouble with logging in or if someone hasn't contacted you from Code With Chris, let me know.
Check the FAQ if you have any questions. I added questions and answers there as they came in.
I wish you all the best of your SwiftUI journey with mine and Chris's videos!
Note: At the end of the day I'll be removing access to all products so be sure you are set up with Code with Chris.








Hi! I am working through this book. I am currently on 'Fetch - Observable Object'. I am getting an error when I try to compile. Can anyone offer assistance?
Error:
Variable 'self.oo' used before being initialized
I even copied and pasted what was offered in the Project -> OO_Fetch
Hi Mark,
I am working with the latest 'SwiftData Mastery in SwiftUI' book. Page 356 and Page 357.
@State private var oo: OO_FetchOO init(modelContext: ModelContext) { self.oo = OO_FetchOO(modelContext: modelContext)”
Excerpt From
SwiftData Mastery in SwiftUI
Mark Moeykens
This material may be protected by copyright.